

I first learned about Dresdon when my clan’s Alor’ad mentioned a guy up in Canada that made custom metal armour, helmets, gauntlets, and pretty much anything he wants to make out of metal. I joined a society on the Mandalorian Mercs forums called Aluminati. Aluminati was setup to showcase those Mandalorian that have the majority if not all of their armour metal. My number is #036. If a member has full metal armour they’ll have FMM attached to their number. Stands for Full Metal Mando in this metal armour society.
#000 – Dresdon Acacin – FMM
#036 – Karl Dha’Werda
The majority of my armour falls into this society and I requested membership on April 3rd, 2016.
Light Modern Armour (All metal is 16 gauge stainless steel sheet metal, with 20 gauge shoulder bells and backplate).
METAL: Back plate (mostly covered by jetpack), chest plates, center diamond plate, abdominal plate, collar plate, shoulder bells, codpiece, kidney plate, blaster (DL-44), carbine rifle (EE-3), and gauntlets are all metal.
ABS: Knees (I had a pair made by Mandalore the Uniter in October, but they ended up being too small for me. I have another commission for a larger set to be made mid-January 2020).
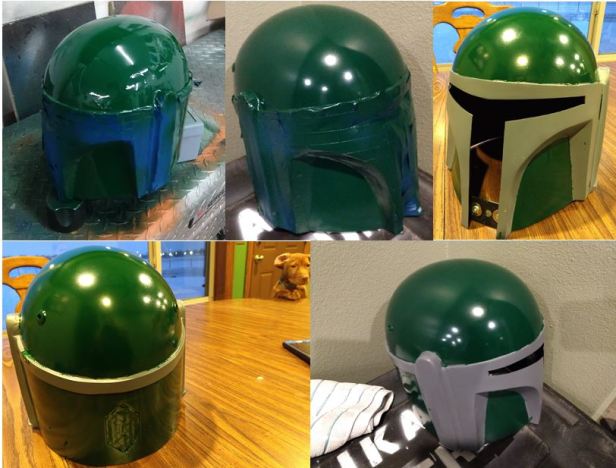
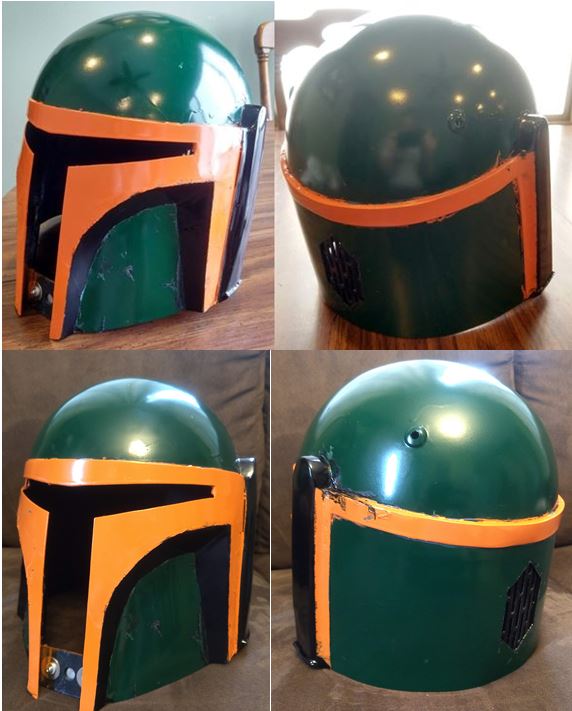
July 15th, 2019: Dresdon contacted me about someone dropping out of his helmet run and if I wanted to drop in the slot. There was no if for me, I jumped at the opportunity. Figured out what style helmet I wanted and sent PayPal to him for the full amount. The style helmet I went with was basic, standard earcaps, diamond rear plate with death star vent pattern, and a slight peak in the front of the visor. The helmet will be replacing my current fiber-resin cast helmet I’ve been using since I became official in November 2015 (see below). The years have not been great on it, and it is starting to warp from a few of the really warm troops over the years.

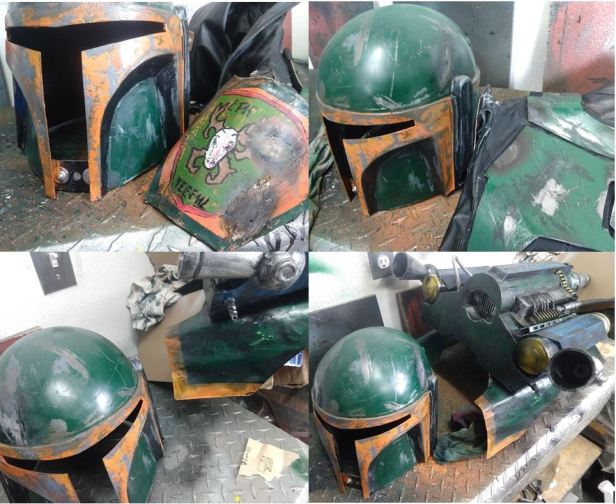
On September 4th I got to see my helmet for the first time. I was super stoked to see it assembled.

The next update was on October 13th, 2019. Lots of filling and sanding.
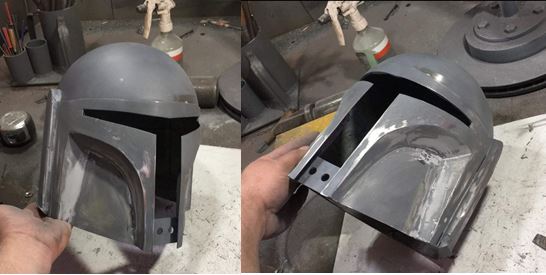
October 21st, 2019 I got another update. More filling and sanding.
October 23rd, 2019 Update: “With the exception of a couple divots like in the earcap tops yoyr buckets good to go for final primer- this stuff is easily hidden with blackwash. Are you ok with this?” With the amount of weathering I needed to do to match the rest of my kit I was okay with Dresdon’s concern areas (see below).

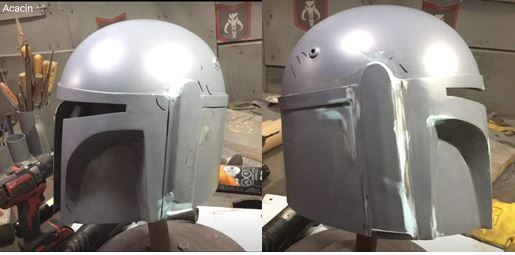
On December 12th, 2019 I was notified that my helmet had been primed and was ready to be shipped.

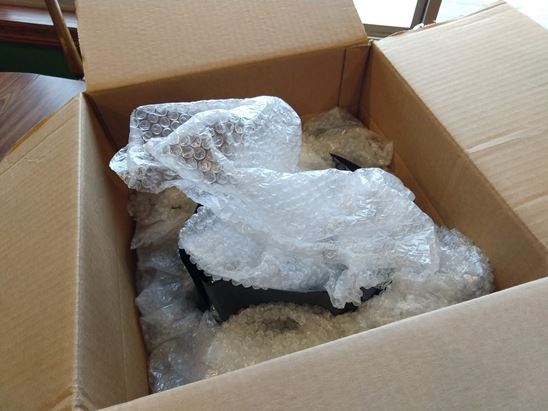
December 24th (Christmas Eve), 2019 my package arrived. It was very well wrapped with bubble wrap and secure in the box when I opened it.
Super excited to start painting my new helmet.

I did a test fit on myself and threw the full mirrored visor in to just see the color. When fully painted and weathered I will cut the visor to size and insert in front of the lower bracket. I also got some stickers.
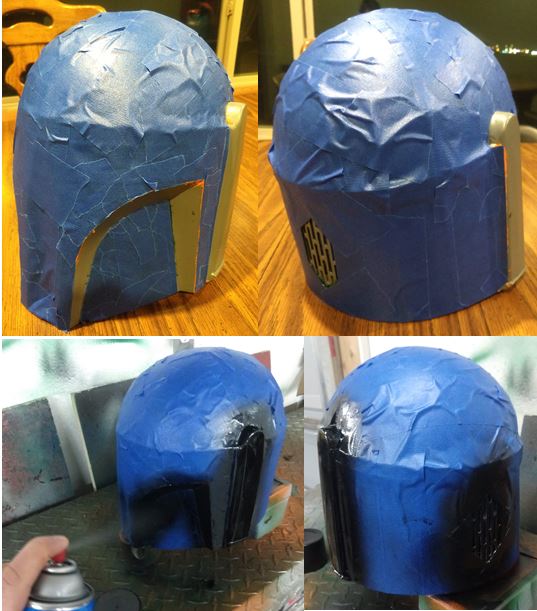
I started by taping and prepping for the base green coats. In the middle of winter, so I painted in my garage.

Once multiple coats had been applied and dried I brought it inside. I removed the painters tape and set it to dry overnight.
The next morning I taped up everything except where the orange accent color would be. Then I applied the orange paint.
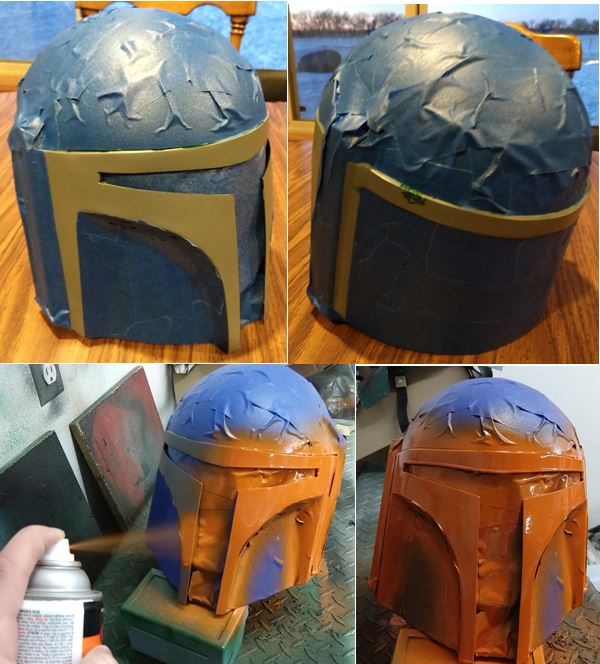
Later that night after the orange had set and dried in the house, I removed the painters tape.
I then prepped it for the remaining black paint areas. I applied painters tape every except where the black would be. Then sprayed on a few black coats of paint.
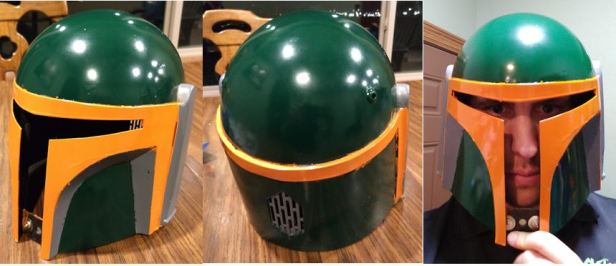
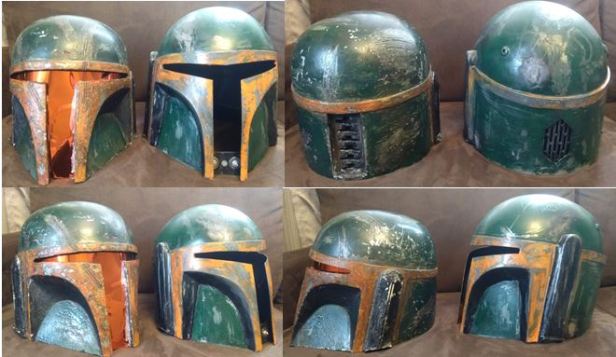
The next morning my helmet was completely painted and dried. Ready for weathering. The colors below are in different lighting locations. They are the same in both.
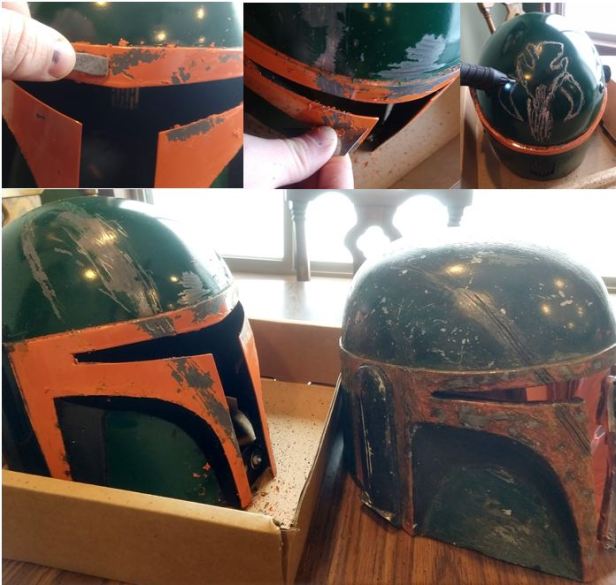
I did a side-by-side comparison of old vs. new to see the difference and what I needed to match. The old helmet is more weathered than my plates on my kit, but mostly because it has been around longer.

I then started the weathering process by first using a flathead screwdriver to chip away any drip and over spray areas. Then I used an exacto knife to peel away more paint to match a similar weathering pattern as my old helmet. On the back I used a metal etching tool to sketch in a mythosaur to the back of my helmet dome.
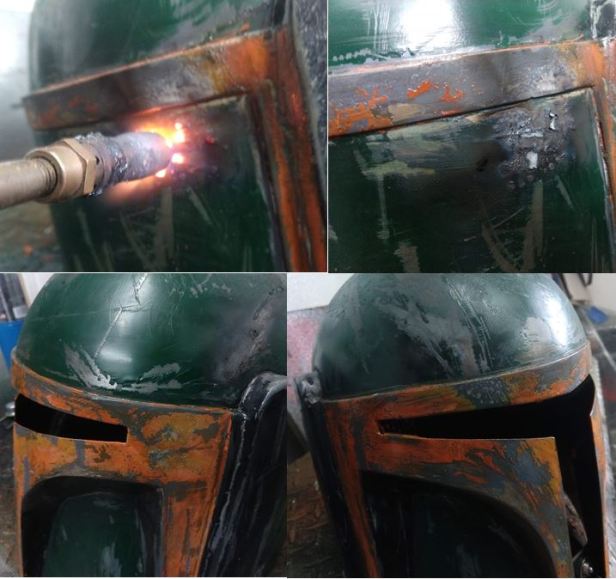
I then went into the garage and started weathering with a butane torch, which made the orange paint turn yellow. I then made a blaster mark on the right rear of the dome, similar location to where there was a mark on my old helmet. I used lighter green on all the hunter green areas to rub into showing metal areas to give more of a weathered look like the orange to yellow.

After the lighter green was applied I used acetone to clear the whole helmet and to show additional weathering. I then weathering my helmet with rocks and dirt.
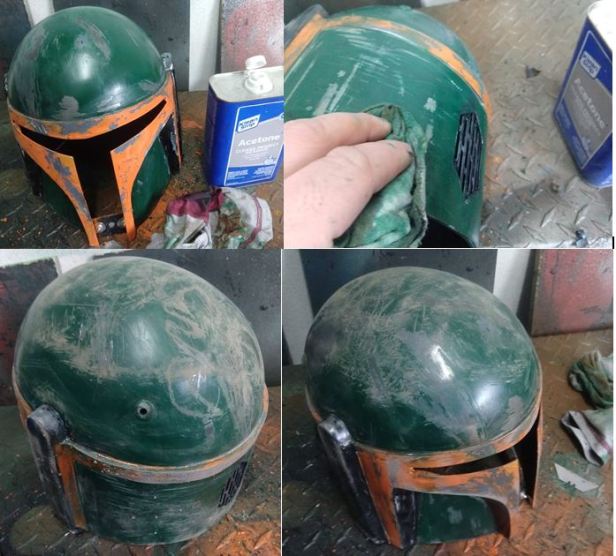
After I obtained the weathering with a high heat effect on the helmet. I also started carbon scoring the helmet with my butane torch. Making the orange around the visor match my old helmet.
The weathering on my helmet now matches the rest of my kit. Below are comparisons to one of my shoulder bells, chest plates, and my back plate with my jetpack.
I then did another side-by-side comparison of my old helmet vs. my new one after weathering it.
Old vs. new with green visor in place. This mirrored green visor from Kalevala Visors.

Next I had to reach out to Dresdon to make sure I put the HUD lights in the right place. I wasn’t sure if it was supposed to be on the inside or outside of the visor.
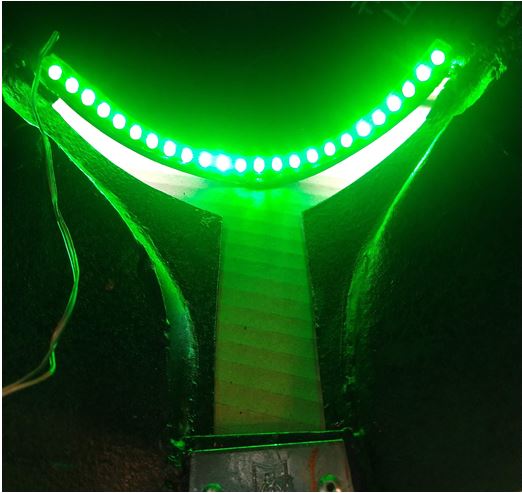
Dresdon confirmed that it will need to be on the outside, so it shines down the front of my visor. I glued the lights in place and then I wrapped the wires in electrical tubes to prevent damage during troops. I used velcro to attach the battery pack.

After a test fit of the visor using a paper template first I cut the visor to fit in better. I also added more padding, trying it on with every pad to make sure it still fit correctly.
HUDs are set. A Heads-up display, or HUD, was a view screen projection that functioned as a form of visual aid. HUD units were fitted into the helmet.
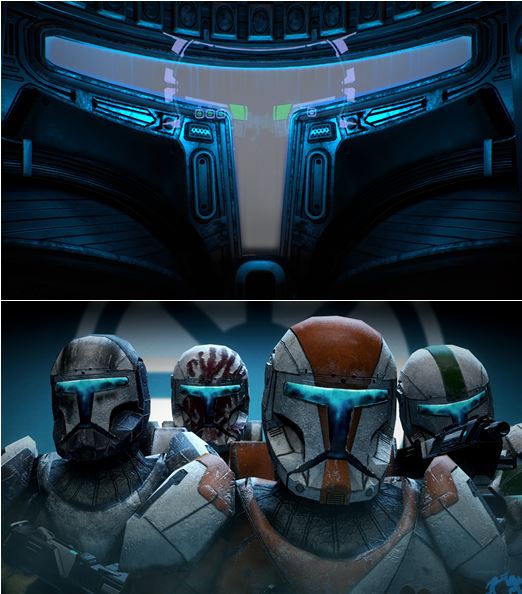
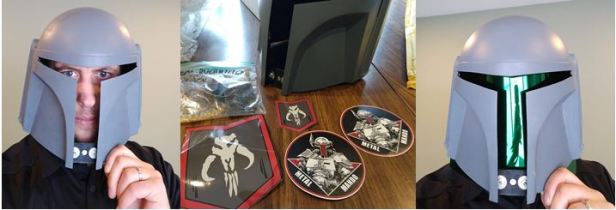
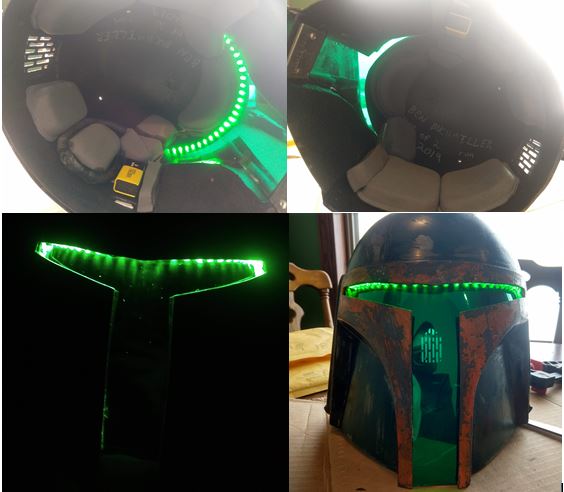
My HUDs were in place and my helmet is complete. The light on looks really cool, but off looks great too with the mirrored green visor. It is the same color as Clone Commander Gree’s lenses.
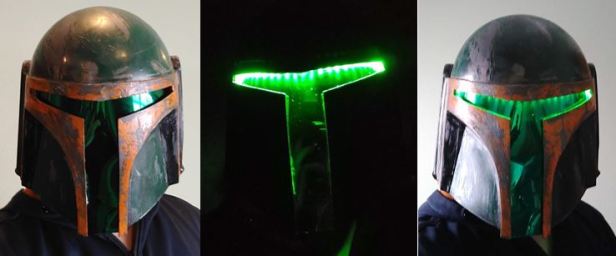
Acacin Armouries installs these HUDs between the visor lens and helmet shell so they DO NOT illuminate the inside or your face… rather they shine DOWN the face of the helmet, and highlight the T visor’s edges. A pro-tip from Dresdon is to leave dust on your visor because it will cause the light to cascade down the vertical portion of your visor lens more similarly to the Republic Commando HUD light artwork. All of his helmets now come with toggle switches so they can be installed to be actuated from the OUTSIDE of the helmet or glued into position along the bottom edge of the cheek of the helmet. It is also notable to mention that these light kits work with both mirrored visors and typical shade5 tinted visors, they work BEST with mirrored visors however because they cascade the light better.

My Vizsla pup, Copper approves.
All stages start to finish.


I love the detail you put into your posts. The helmet looks great!
LikeLike